When we designed this dinette, we had delusions of converting it from bed to dinette and back again each day. Every inch of space under and behind it can be reached somehow. Drawers provide accessible storage space even when it is set up as a bed. That has been a lifesaver.
 |
| This is our overflow social space at home. |
 |
| This is our bed on the road. |
This is what it looks like set up as a bed. We have space in the drawers for clothes and space behind the headboard for reading glasses. The rest of the storage under the bed gets used only when we put the bedding in there and set up the seats. The space behind the headboard holds our insulated window covers for desert camping. The space at the foot makes a handy clothes hamper when we're on the road.
 The project started in April, 2010 with the construction of six internal frames. Four of them had solid plywood gussets like the frames shown here. Two others had the centers almost entirely cut away for the drawers to slide through at the ends of the bench boxes. The frames have grooves routed for the center plywood gussets. Gussets and 1x4 frame wood are glued and screwed together. They are extremely sturdy for their weight. The edges provide a surface for attaching other components such as the fronts and seat lids.
 |
| Upright supports match the wall curve, support the back rest. |
I attached the seat tops and back rests with hinges and gave the whole exterior a coat of Watco Danish oil while I planned and prepared for building the drawers. It was my first time building drawers and I was a little bit daunted. Everything needed to fit precisely or the drawer guides wouldn't work properly and the drawer fronts wouldn't be flush with the sides.
 |
| Full extension drawer slides allow easy access. |
Cutting out the drawer faces was tricky because I wanted them to be made from their place in the dinette side wood. Three very small drill holes in a line at the bottom of the drawer front perimeter were enough to let the jig saw blade in.
 |
| The drawers are as big as possible. |
One Sunday in July, I cut out the drawer fronts in the morning and got on a plane to England with a group of middle schoolers in the afternoon. While I was gone chaperoning for three weeks, Bart attached the drawer fronts and dinette side pieces. The morning after I got home in August, we pulled the Tin Pickle out of the driveway for our annual trip and the Pickle's first visit to Lopez Island.
Bart also attached the ledge boards at the front of the seat boxes to support the cushions when it is made up as a bed. We never added a table. The difficulty of making and unmaking the bed, plus the absence of an easy way to attach or support the table postponed table construction indefinitely.
 |
The "lock" keeps drawer closed on the road. |
 |
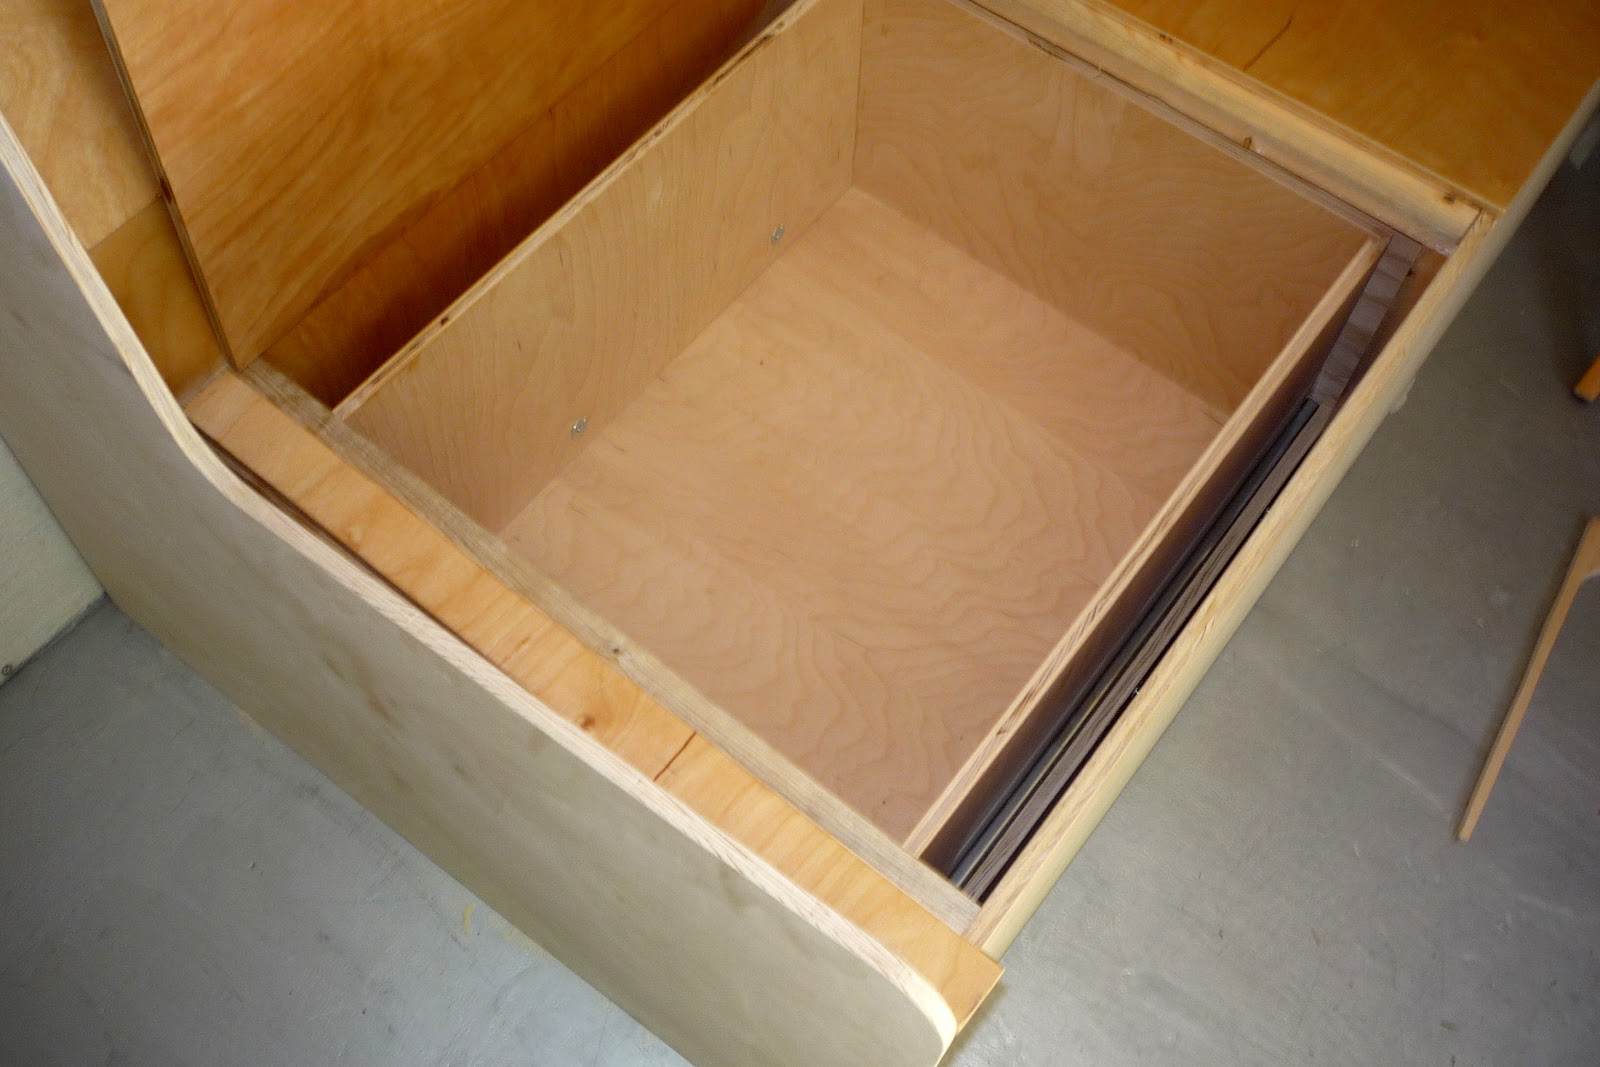
| Every part of the dinette is accessible. |
The foam was marked with a sharpie and cut with a serrated kitchen knife. Small wiggles don't show, especially if the foam is compressed by a snug fabric cover.
 |
| Foam was cut with a serrated kitchen knife. |
The foam is 5" high density foam from JoAnn's, bought with 50% off coupons. The upholstery fabric was discount surplus from www.newtoto.com. I cut the fabric pieces about 1/2" short in each direction to ensure a snug fit with minimal wrinkles.
I used zipper by the yard, also from JoAnn's, so that each cover is removable for washing.
 |
| Each cushion cover has a zipper |
Working with the stand alone frames helped me visualize the project as I went along. At some point, I put a few screws through the frames into the plywood floor to hold the benches in place. There are also a couple of small, discreet L brackets that hold the uprights against the trailer wall to limit movement and chafing. But the dinette benches remain solid units that could be moved out of the way if needed.
looks so neat and tidy. What time are cocktails served?
ReplyDelete