The answer was very simple in the end, if you looked at all the angles. This detailed post will likely interest only people with early 1970's model
Airstreams who want to know what the inside of their closet doors look
like. It is for them that I write this. The question at hand was how to bring our closet doors into our new all-birch interior color scheme and meet some specific criteria.
They should:
1. look like they belong with the new birch bulkheads and beech counters
2. remain in keeping with the aluminum extrusion construction of the early 70's Airstreams
3. be easy to open and easy to latch
4. stay securely shut while en route.
Simple, right?
Saturday, November 23, 2013
Friday, June 21, 2013
Versatile Desk
June, 2013
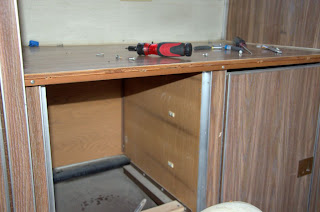
Here's another of those "I'm really glad I did it once, but I wouldn't want to do it again" projects. Our trailer came to us with an old desk with two cupboards underneath. One side didn't even have a door. It didn't work as storage; it didn't work as a desk. One side was too narrow for two knees. How could we keep the aluminum frame feel of the original trailer while making the desk useful for travel storage or as a work-from-home desk?
For a closer look and for construction details, keep on reading.
Here's another of those "I'm really glad I did it once, but I wouldn't want to do it again" projects. Our trailer came to us with an old desk with two cupboards underneath. One side didn't even have a door. It didn't work as storage; it didn't work as a desk. One side was too narrow for two knees. How could we keep the aluminum frame feel of the original trailer while making the desk useful for travel storage or as a work-from-home desk?
 |
| BEOFRE: Original desk was missing a door. |
 | |||
| AFTER:Storage and a pull-out keyboard tray | . |
For a closer look and for construction details, keep on reading.
Friday, April 5, 2013
Rock Guard From Fabric and Foam
 |
| Watchful eyes protect from road debris |
I try to keep these blog posts organized in the order they happened, but sometimes that means I'm writing about things I worked on months or years before. Please bear with any fogginess on the details.
I don't remember my exact steps for making this rock guard, so this isn't big on details. Besides, a full narration of my two steps forward, one step back technique on this could get tedious. So I'll make it a summary of what our rock guard looks like now, what went into some of the decisions, and what aspects of it work well for us.
Wednesday, March 20, 2013
A Birch Interior
 |
| Finished birch interior |
We wanted a lighter, warmer interior for our trailer. We also wanted to keep the vintage Airstream feel that came from the lightweight aluminum frame construction used in the early 1970s. If I had to give a name to the design style, I might call it Retro Futuristic, looking back and forward at the same time.
The work taught us about all of the interior systems in the trailer, since we ended up removing and/or replacing nearly everything on the inside. If you are facing similar work, I hope this blog gives you the information you need to help in your decisions or your work. I hope it serves to encourage. I am not a woodworker, but I have learned how to handle wood. I am not a wood finisher, but I have learned to handle finishes to a level that works for us. I find that I enjoy the engineering sorts of challenges (see the Versatile Desk post in this blog), but that wasn't strictly necessary for this interior. If I can do it, you can do it.
There are only a few essential tools. I couldn't have done it without the jigsaw, the cordless power drill, the palm sander and the pop riveting tool. Hand tools such as hammers, screwdrivers, adjustable wrenches and a rubber mallet come in handy. It helps to have an accurate table saw. I had access to one nearby and sawed things in batches. This took extra planning, but I had no other choice. My hand isn't steady enough to do the long, straight cuts with a jigsaw and I'm not strong enough to wield a circular saw with safety and accuracy. Read more for pictures and details.
Subscribe to:
Comments (Atom)